Chapter 2 - Introduction to Programming
Contents
Chapter 2 - Introduction to Programming#
2.1 Using the Terminal#
This tutorial introduces UNIX commands compatible with systems such as MacOS and Linux. If you are using Windows as your operating system, please install Windows Subsystem for Linux (WSL) or Cygwin. These are emulations of a UNIX system within the Windows environment.
Instructions on how to install WSL are available from here. Instructions on how to install Cygwin are available from here.
What is a file system?#
The file system of an operating system is structured like a tree with a root and many branches. There are folders, also known as directories, that are inside other folders and this produces the tree-like structure. Each directory can contain many files and other directories. The diagram below illustrates an example of a file system’s structure.
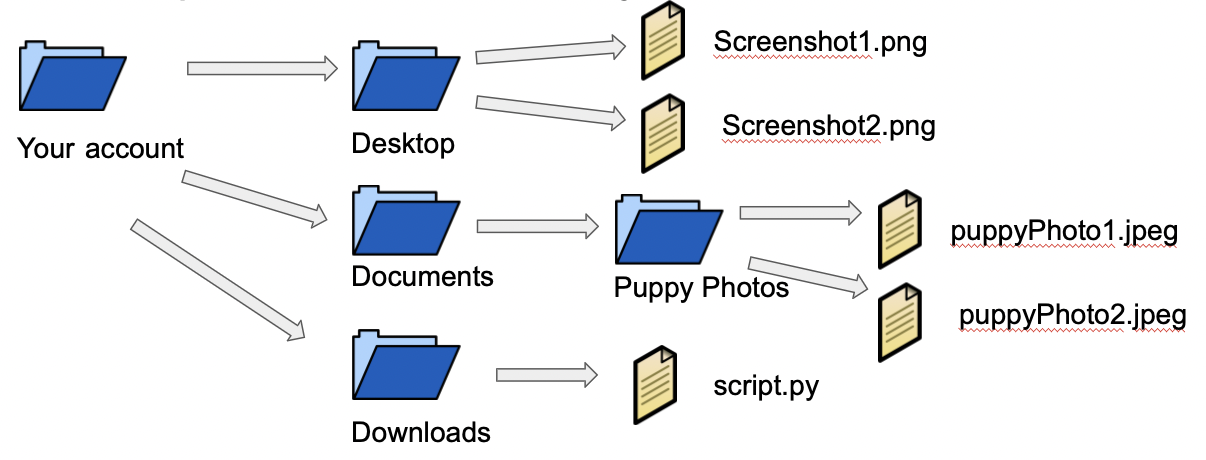
In this example, the folder “Your account” is the root directory.
The root directory contains three other folders: “Desktop”, “Documents”, and “Downloads”.
The Desktop folder contains files that include images which are screenshots; the Documents folder contains another folder consisting of puppy photos, and the Downloads folder contains a script written in Python.
Methods of navigating the file system#
Option 1: Using a program like Finder (on MacOS) or File Explorer (on Windows) you can browse and search for files and folders

Fig. 1 Finder#

Fig. 2 File Explorer#
They are convenient because they visualize the structure of the file system.
Option 2: Using the terminal to browse and search the file system
There is also a way to browse and search for files using the terminal and the command line.
Benefits:
Can be faster once you learn and memorize several commands
More functionality and flexability–it has features that are only accessible through the terminal and command line
Using the terminal for programming tasks is a requirement, so getting used to the command line interface is an important first step.
Opening the terminal#
The way you open the terminal depends on your operating system.
For example, on MacOS:
hit command + shift
type “terminal”
hit enter
Here is the result when opening the terminal on a Mac:
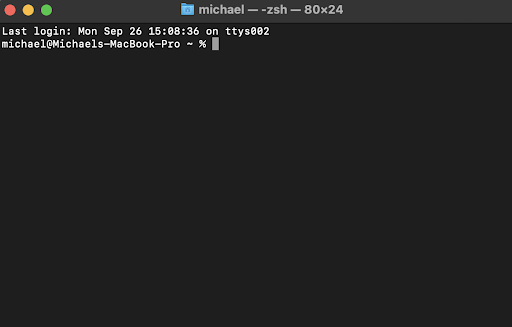
Although your terminal may not look exactly the same, it should still resemble the image above.
Commands that are important to know#
Below is a list of commands that are critical to learn when interfacing with the file system:
pwd
ls
cd
mv
mkdir
rm
rmdir
find
grep
Note that these are UNIX shell commands.
Helpful tip: when writing the name of a file or a directory, hitting “tab” will fill in some or all of the name. This can save you time typing the full name every time.
The pwd command#
When using the terminal, you are always present at a particular directory. Note that when you first open a terminal, you will be placed in what your system considers the “home” directory.
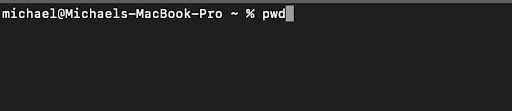
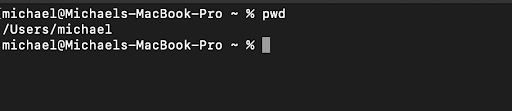
The pwd command, which stands for “print working directory”, shows you where you are within the file system.
This is what the terminal may look like when opening it and typing the pwd command:
After hitting the “enter” key, the command is run. As you can see in the below image, the result says that the current directory is /Users/michael, which is the home directory on Michael’s computer.
The ls command#
The ls command, which stands for “list”, displays the contents of the current directory.
This is what happens when you type “ls” in the terminal and press enter:

Recall that the terminal is at the home directory. As you can see, there are many directories contained within the home directory, such as Applications, Documents, Library, and more.
Command flags#
Many UNIX shell commands, including ls, have many options that you can configure. To set these options, you will need to add a “flag” (or flags) after you type in the command.
Here are just a few examples for the ls command:
ls -a
Purpose: displays files that normally are hidden, the “a” stands for all.
ls -l
Purpose: displays extra file information, such as file permissions, the “l” stands for list.
ls -s
Purpose: displays file sizes, the “s” stand for size.
There are other flags for the ls command, and there are also flags for other commands as well. To see all the flags with examples you can type:
man ls
The “man” command stands for “manual” and provide information about each UNIX shell command.
At the moment, it is not necessary to memorize all the flags for all commands, but it is a good idea to be aware that they exist and that you can look them up when needed.
The cd command#
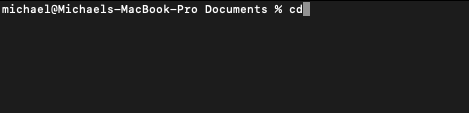
The cd command, which stands for “change directory”, will assist your terminal to switch to a new directory, for example, enter and exit the home directory.
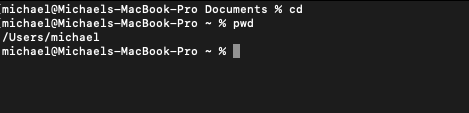
This is what the terminal looks like when you are in the Documents folder and type the “cd” command. Note that the terminal prompt includes “Documents” to alert us to where we are in the file system.
As you can see, after typing “cd” and pressing “enter” we are back in the home directory /Users/michael.
The reason that “cd” stands for “change directory” is because the command’s main feature is to switch to a different directory.
As you can see in the image below, you must specify the target directory that you would like to move to. In this example, we are in the home directory. Since the home directory contains the Downloads directory, we run the command “cd Downloads” to move into that directory.

Specifying the name of a sub-directory enables moving depper into the file system’s branches. One method of moving back up towards the root of the file system is with the following command:

The “..” represents the directory above the current directory that we are in at present.

The mv command#
The mkdir command#
The rm command#
The rmdir command#
The find command#
The grep command#
Video & Slides#
[Put video here]
2.2 Intro to Python#
Python is a popular programming language used across a wide variety of fields, including data science and machine learning. Many well-documented Python libraries (collections of pre-written code designed for specific tasks) exist today, due in part to the large user base.
Installing Python#
Check Python version#
First check if you have Python already installed on your system by opening a terminal and entering the following commands:
`python --version`
`python3 --version`
If Python 3 is already installed, the terminal should return something like Python 3.x.x.
Note: Often, Python 2 (Python 2.x.x) comes pre-installed on MacOS, with the specific version dependent on the MacOS version. However, Python 3 is highly recommended for most practical programming purposes, and we strongly recommend you download Python 3 regardless of your OS.
Download Python#
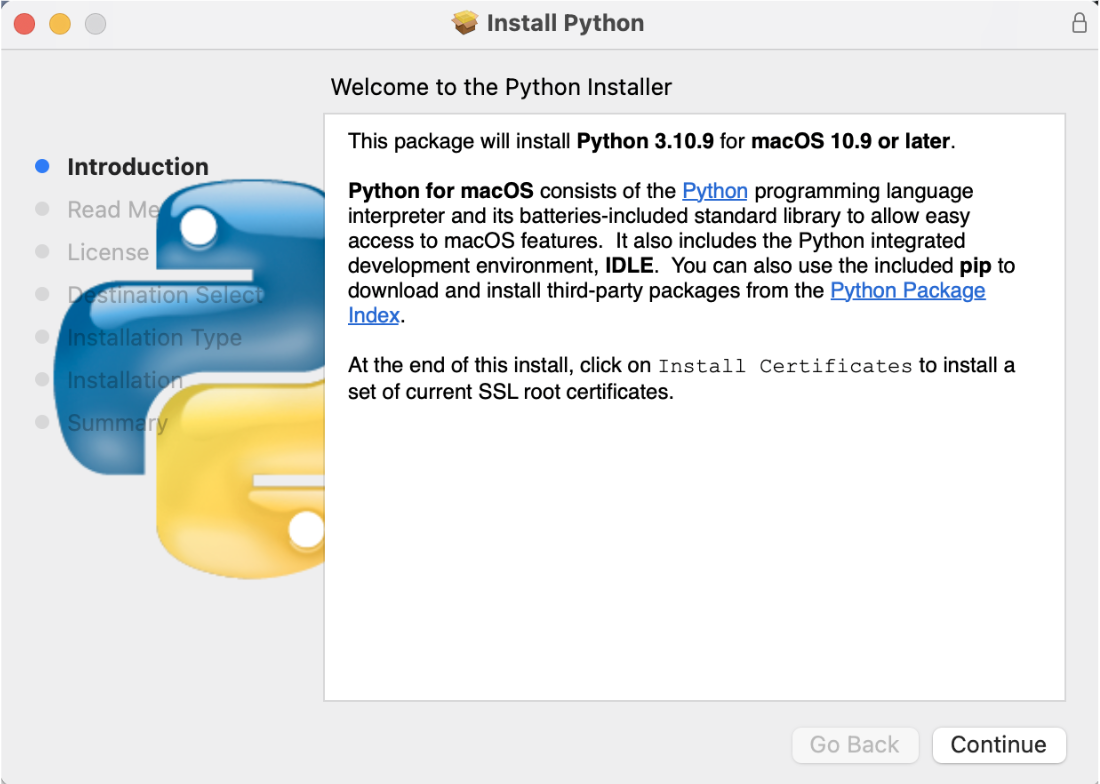
Python 3 can be downloaded from the official Python site. The site should automatically detect the latest Python version for your operating system.
Once downloaded, locate the installer on your system (usually in your Downloads folder), double click the installer, and go through the installation process.
Note: On Windows systems, make sure to select both the Install launcher for all users and the Add Python 3.x to PATH options when they appears.
You can then verify that the installation was successful by running the following command again in your terminal, and checking that some version of Python 3.x.x is printed:
`python3 --version`
Text Editors#
Text editors, as their name suggests, are applications with the basic functionality of writing and modifying text documents; examples on MacOS include a built-in editor with a user interface (TextEdit) as well as Terminal-based editors (Vim, Nano), while Windows systems contain Notepad as a built-in text editor.
While these basic text editors can be used for programming, more sophisticated text editors known as integrated development environments (IDEs) exist specifically for writing code. IDEs usually include helpful features like “spellcheck” to help identify errors in the code, tools to actually run the code, and the ability to integrate with other apps for things like collaboration or code automation.
A few popular IDEs:
Visual Studio Code –> Very popular and used by most of the Ma’ayan Lab!
PyCharm –> Note that PyCharm is a Python-specific IDE
Writing Your First Program#
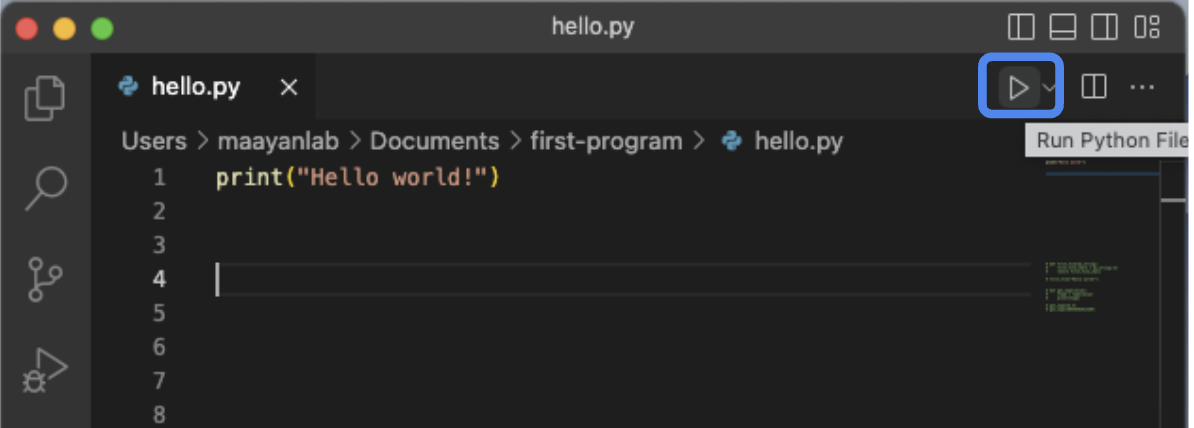
Once you have downloaded both Python and your code editor of choice, you can start writing your first program! Below are the basic steps to follow, with screenshots taken from Visual Studio Code. If you choose to use a different editor, note that the exact steps may be slightly different, although the general process should be consistent.
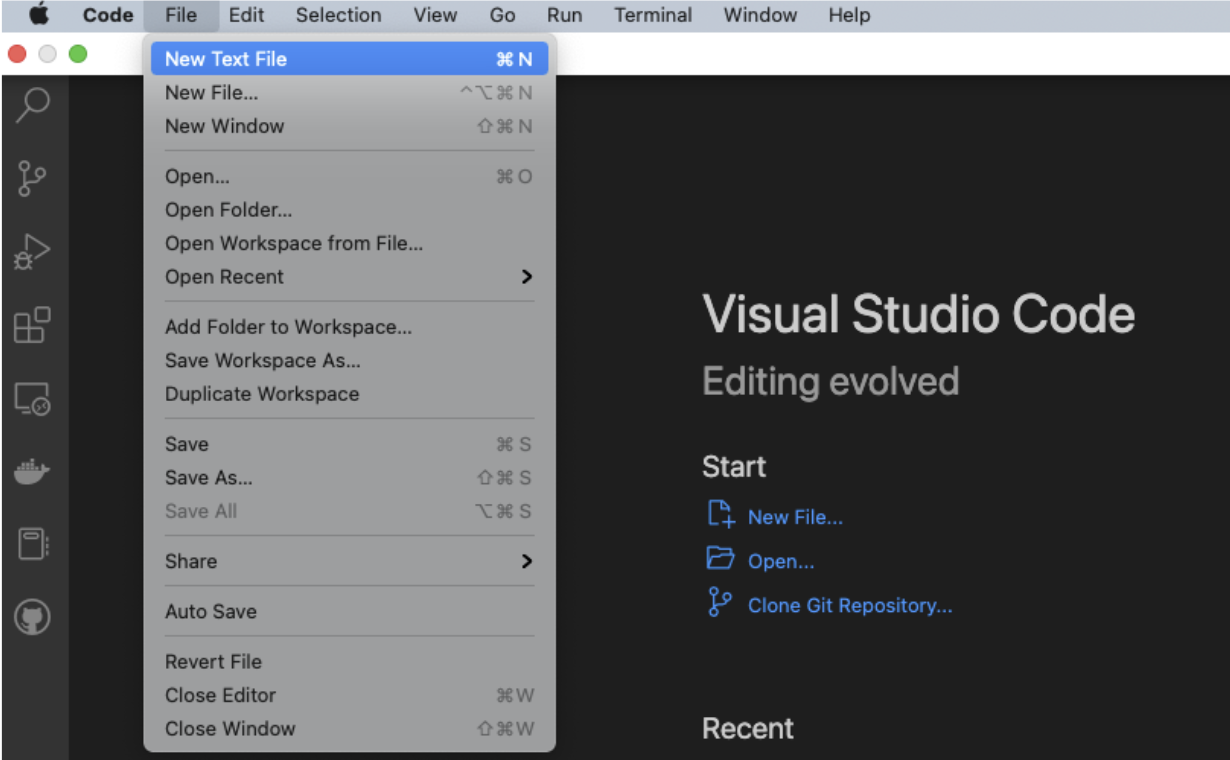
First, open your text editor and create a new text file.
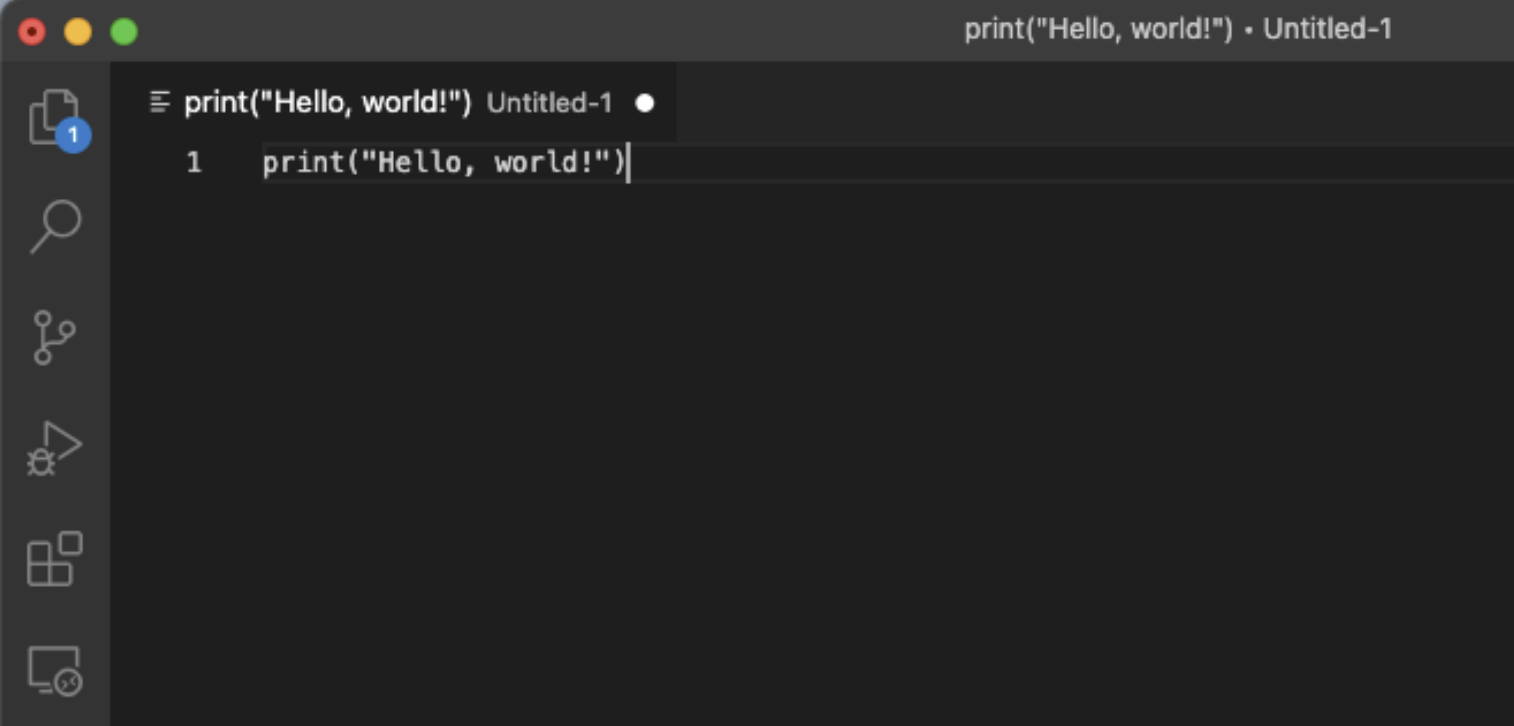
Type the following text exactly as written into the document:
print("Hello, world!"). You don’t need to worry too much yet about what this means.
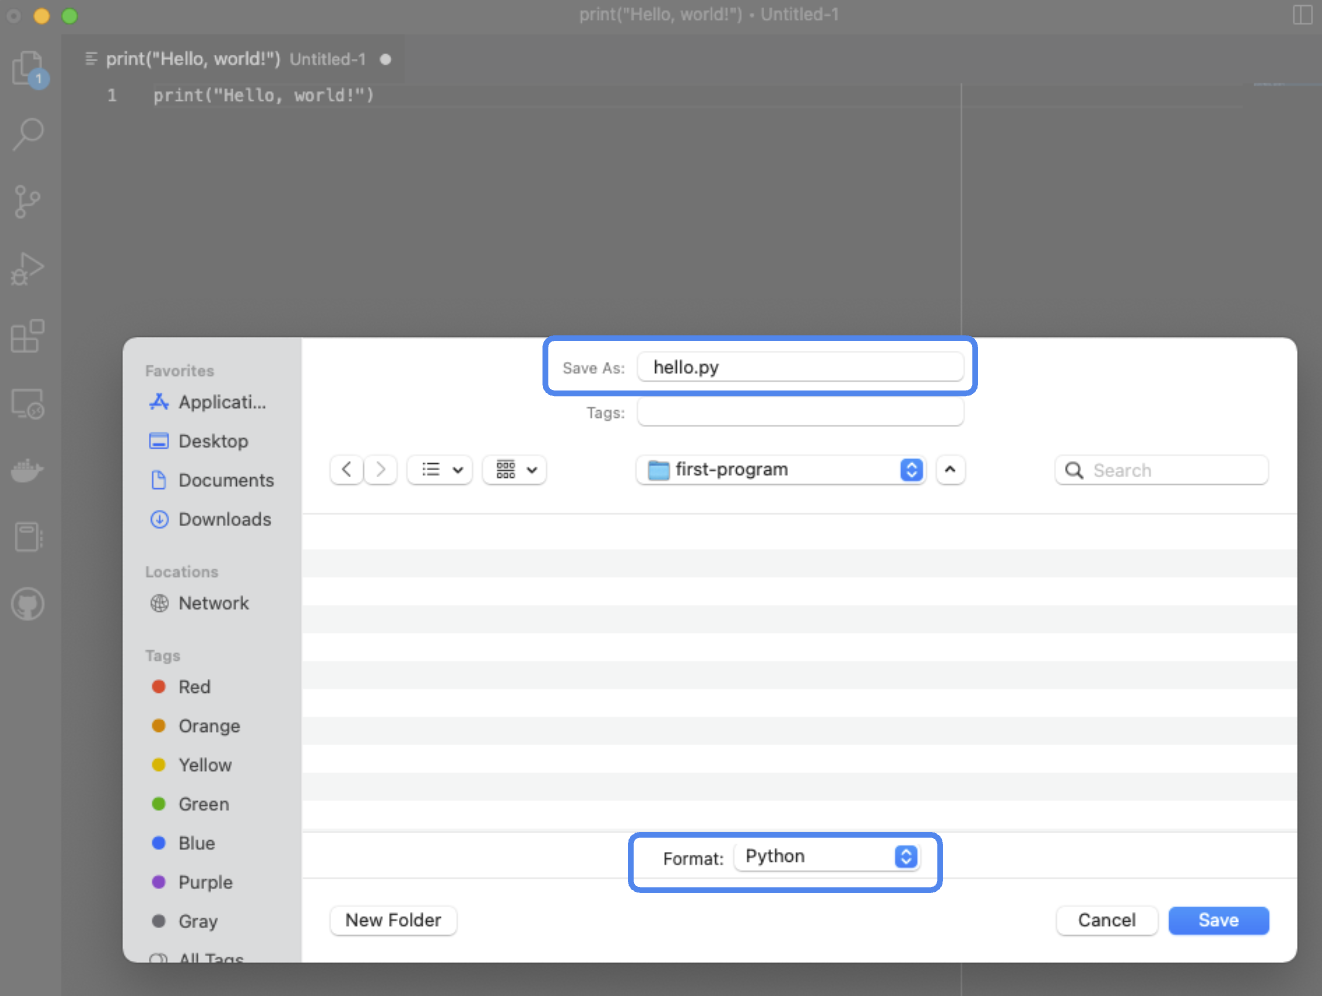
Use the “Save As…” option in the file menu to save the file as a Python file. This can be done by adding the extension “.py” to your filename, and/or by directly selecting “Python” as the file format.
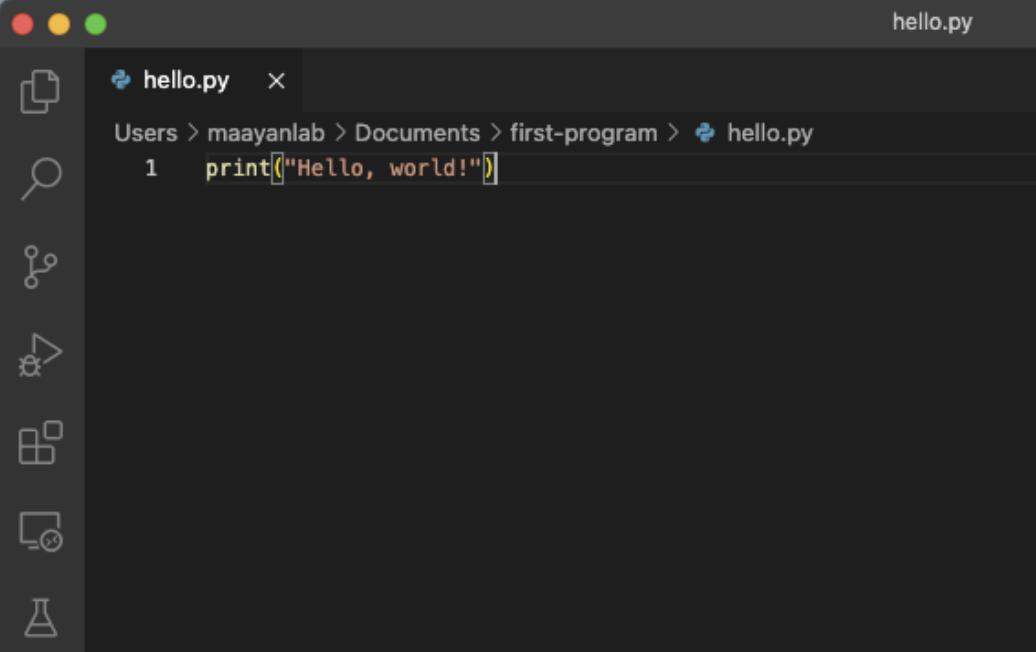
Once your file is saved, you may notice that your code has changed in appearance. This is because many code editors contain language-specific features that allow for functionalities like color-coding or hovering for extra details. In Visual Studio Code, this is made possible by the Microsoft Python extension, which can be installed manually from the Extensions tab.
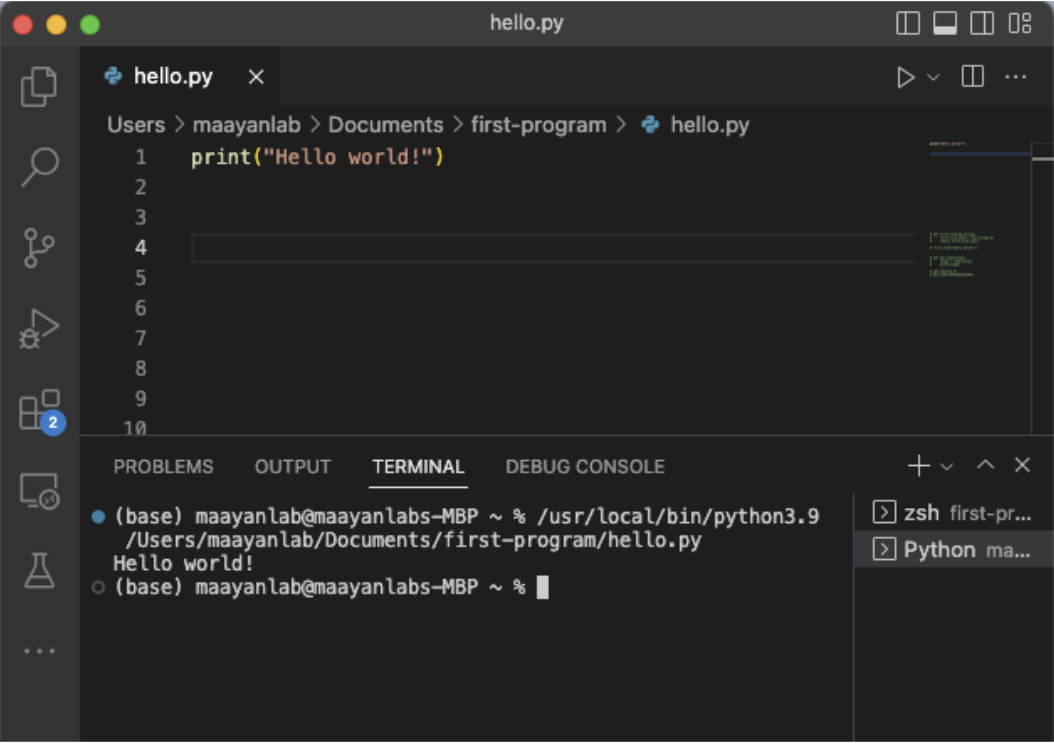
You can now run your program! Most text editors will come with a built-in “Run” command, which will execute your code. Any results that are printed out will then display in your terminal.
2.3 Basic Python Concepts#
Variables#
Variables are named references that store some value. For instance, take the following code:
x = 5
This line creates a variable named x and uses the assignment operator = to assign to x the value 5.
If we wanted to update the value stored in x, we can simply reassign it as follows:
x = 5
x = 6
If we then evaluate x, we can see that x now references the value 6.
>>> x
6
Data Types#
While this tutorial won’t cover all the data types available in Python, we can go over some common ones:
String (
str): Sequence of text charactersIn Python, strings are denoted with either double quotes
“ ”or single quotes‘ ’Ex:
“Hello world!”or‘asdf’
Integer (
int): Positive or negative whole numberEx:
2023or-2023
Floating point number (
float): Number with a decimal pointEx:
12.5or-1.3333333
Boolean (
bool): Logical value that can only be True or FalseTrueorFalse
List (
list): Collection of values in a sequenceIn Python, lists are denoted with square brackets
[ ], with commas separating each itemEx:
[1,1,2,3]or[‘a’,1,True]
Indexing sequences#
Note that str and list types are both defined as sequences – of characters and of values, respectively. This allows values of both types to be indexed, in the sense that each item in the sequence can be accessed via its numerical position from 0..n-1 where n is the total number of items in the sequence. The notation for for indexing both lists and strings is similar:
>>> mylist = ['a', 'b', 'c', 'd']
>>> mylist[2]
'c'

>>> mystring = "Hello world!"
>>> mystring[6]
'w'
Slicing sequences#
Sequences can also be sliced, which is when multiple values are indexed at once. The notation is similar to indexing, except you will need to have both a start and end position. Note that if the start position is the first index 0, the start position can be omitted. Likewise, if the end index is the last index n-1, the end position may be omitted. See the following examples:
>>> mylist = ['a', 'b', 'c', 'd']
>>> mylist[0:2]
['a', 'b']

>>> mystring = "Hello world!"
>>> mystring[:6]
'Hello '
Don’t forget that white space, such as spaces and tabs, count as individual characters in a string!
Other data types#
While these weren’t covered explicitly in the lecture, these are some other common data types you may encounter:
Set (
set): Unordered collections of unique values denoted by curly brackets{ }Ex:
{1, 2, 3}or{'a', 1, True, 1.0}
Tuple (
tuple): A sequence of values that may not be changed, unlike lists, and denoted by parentheses( )Ex:
(1, 2)or('Hello', 5, ' ', False)
Dictionary (
dict): Unordered collection ofkey:valuepairs denoted by curly brackets{ }Ex:
{'a':1, 'b':2}or{1:['a', 'b'], 2:('c', 'd'), 3:True}
Operators#
In Python, operators perform actions on different variables and values to yield some result. Earlier, we saw an example using the assignment operator (=):
x = 5
There are several common arithmetic operators that are useful to know, which work similarly to their mathematical counterparts when used with numerical data types:
Addition (
+)Ex:
5 + 3or-5.0 + 0.123
Subtraction (
-)Ex:
-23 - 0.01or40 - 0
Multiplication (
*)Ex:
2.2 * 0.5or12 * 345
Division (
/)Ex:
2 / 2or0.81 / 0.9
There are also comparison operators, which may operate on numerical, string, or boolean data types, but which always return a boolean result:
Equal (
==)Ex:
'hello' == 'HELLO'or5.0 == 5
Not equal (
!=)Ex:
" "!=" "or1 != (0.5 * 2)
Greater than (
>)Ex:
"a" > "b"or-2.3 > -2.39
Greater than or equal to (
>=)Less than (
<)Ex:
"a" < "b"or-2.00001 < -2
Less than or equal to (
<=)
Note that for operators with more than one symbol, order matters! Python reads left to right, just as in plain English.
Functions#
Functions are blocks of pre-defined code that return some value. They are defined using the def keyword, with all code within the function indented. External values may be passed into a function via parameters.
def first_five(input_string):
    first_five_chars = input_string[:5]
    return first_five_chars
The example function above takes in some external string that will be assigned to the variable input_string within the function. The function will then return the first five characters of input_string. To run the function and get the returned result, you will need to call it as shown below:
new_string = first_five("Hello world!")
If you then print out new_string, the result should be the string "Hello", or the first five characters of "Hello world!"
If/Else Statements#
Python supports conditional logic using if statements. Basically, if some condition is met, run some code. The basic syntax is as follows:
num = -5
if num < 0:
    print("negative")
num < 0 is the condition, which evaluates to either True or False. In the specific case above, it will evaluate to True, and thus the code within the indented if-block will be executed and the string "negative" will be printed out. Conversely, if we were to change the code such that num = 5, nothing would be printed out because the condition evaluates to False and the code within the if-block is not executed.
However, let’s say we want the code to let us know if some number is positive as well. We can add an else keyword to catch all cases where the condition evaluates to False. In other words: if some condition is met, run some code; else, run some other code.
num = -5
if num < 0:
    print("negative")
else:
    print("positive")
In this above scenario, code within the if-block is run if the condition (num < 0) evaluates to True, and code within the else-block is run in all other cases (when the num < 0 evaluates to False).
For Loops#
One other action we can take on sequences in Python is to iterate over them, or go through each value sequentially. This can be done with a for loop:
my_list = ['a', 'b', 'c]
for val in my_list:
    print(val)
When this code is run, the for loop will assign (or re-assign, after the first value) each value in my_list to the variable val. The code inside the loop is then executed, which means the current value referenced by val will be printed. The for loop will keep running until it has gone through every value in my_list.
Libraries#
While this lecture goes over some basic Python concepts, we obviously want to eventually do more in Python than just adding numbers and printing out text – but the good news is that we don’t need to necessarily code everything we need from scratch! Part of what makes Python so valuable in the field of data science is the wide variety of code libraries available for Python. These collections of pre-defined code are often centered around some theme, or designed for performing specific complex tasks.
Below are a few examples of popular libraries for data science and bioinformatics that you might see throughout this course:
numpy: Covers a multitude of mathematical and statistical functionspandas: Allows for manipulation of large data tablesscikit-learn: Offers machine learning algorithms for tasks like classification, regression, and clustering
Installing libraries#
Python libraries can usually be installed on your system using the pip package installer in the terminal, which is included with all versions of Python 3.4+. The command can usually be run as follows:
pip3 install [package]
A successful installation may look like this:

Importing libraries#
You will then have to import each library you need into each script where you use it, usually be inserting the following command at the top of the script on its own line:
import [package]
Some packages, including numpy and pandas, have abridged naming conventions, and you may see them imported in the following way:
import [package] as [abridged name]
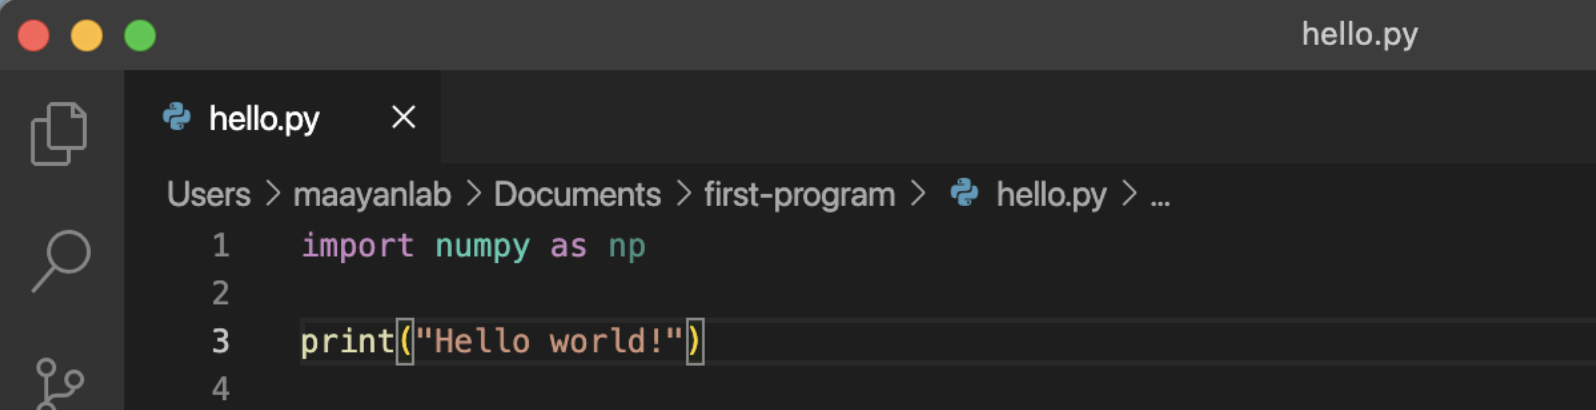
numpy is often imported as np, while pandas is often imported as pd. While not required to use the libraries, it is a good idea to follow these conventions. You can always check the import documentation for any library online to check if there is a standard naming convention.
NumPy#
Briefly, NumPy (Numerical Python) provides functions for working with multi-dimensional arrays. The cornerstone of the numpy package is the np.ndarray object, which is a data structure that can efficiently store the aformentioned multi-dimensional arrays. Additionally, using numpy tends to be much more computationally efficient (memory-wise and time-wise) than using built-in Python lists, making it a useful package for linear algebra and any type of matrix or vector based mathematics.
Note that functions, variables, and other objects can usually be called from their respective libraires using dot (.) notation. For example, to construct a one-dimensional NumPy array object in Python after importing the numpy library as np, you can type the following:
np.array([1, 2, 3, 4, 5, 6])
For more information, see the Numpy: the absolute basics for beginners page.
Pandas#
Pandas is a library for creating and wrangling large datasets that is built on top of NumPy. One helpful benefit is that pandas allows you to read from and write to standard data table formats such as CSVs, TSVs, and XLSX files. This is incredibly important when working in bioinformatics, or any field where you want to operate on some external data; otherwise you would need to somehow copy and recreate all the data into Python, which will be more time-consuming and error-prone.
The basic data structure of pandas is the pd.DataFrame object, which can store large tabular datasets. In addition to functions for efficiently manipulating the data and performing computations, pandas also contains fast algorithms for generating visualizations from the data.
You can construct a 3x2 DataFrame object as follows:
pd.DataFrame(
    [[1,2],
    [3,4],
    [5,6]]
)
For more information, see the Getting started with pandas page.
External Links:#
More advanced Python Tutorial
W3Schools Introduction to Python
NumPy documentation
Pandas documentation